Think that you have just found a stunning photograph on Pinterest, a news website, or social media.
But there's one problem that nobody mentions who took it or where it originally came from.
You search for the picture and discover it on dozens of websites.
Some credit a photographer, others mention a stock agency, and several don't provide any source at all.
So, how do you find the original source of an image?
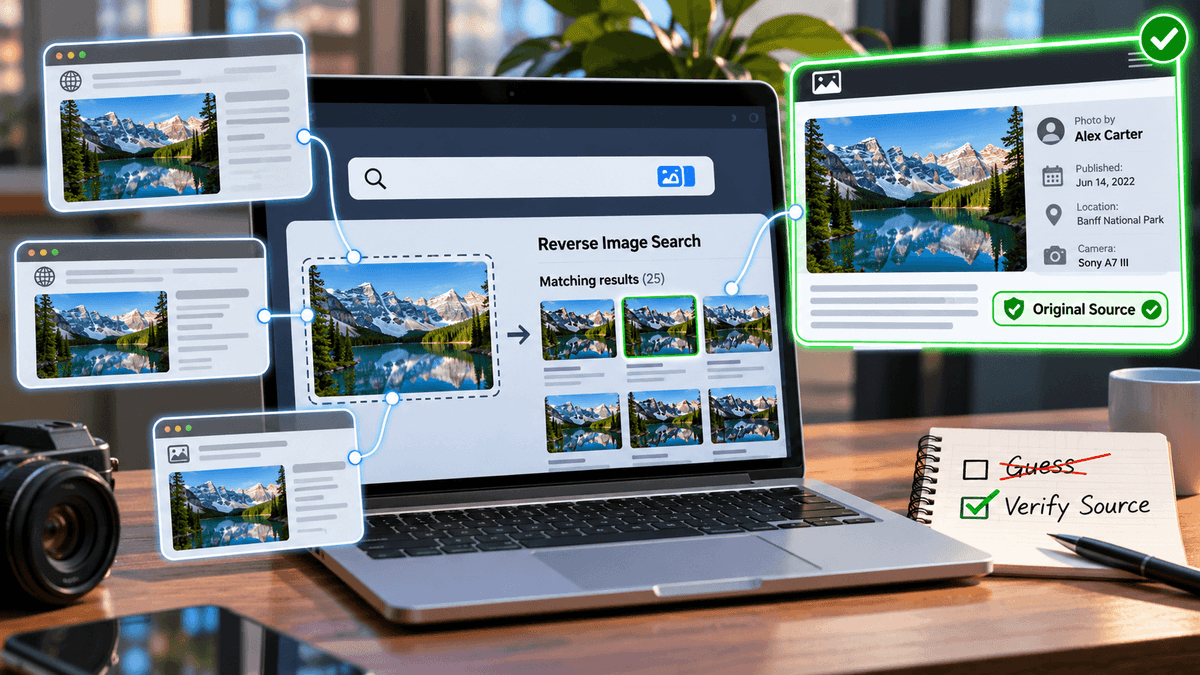
You can start with an AI Reverse Image Search to discover where the photo appears online.
Then examine publication dates, photographer credits, image metadata, and official records to identify its most credible source.
But remember, the person who created an image, the website that first published it, and the earliest surviving online copy aren't necessarily the same.
And when pictures are cropped, edited, or reposted, identifying their origins becomes even trickier.
In this guide, we'll walk through the process step by step, from finding matching images to verifying their sources using real examples.
| How Do You Find an Image's Original Source? |
|---|
| Upload the picture to a reverse image search tool and open websites containing matching images. Compare publication dates, photographer credits, licensing details, and archived copies. Remember, the oldest result in Google or TinEye isn't necessarily the original. You'll need supporting evidence to identify the most credible source. |
So let’s start with -
Which Method Works Best for Finding an Original Image Source?
Not every tool helps you find the same kind of information.
For example, CopyChecker and Google Lens can help you discover matching images, while TinEye can reveal older crawled copies.
A photographer's portfolio or official archive may then help you verify who created the picture.
Here's what each method can tell you and when it's worth using.
| Method | Best for | Evidence Returned | Main Limitation | How to Verify |
|---|---|---|---|---|
| CopyChecker AI Reverse Image Search | Finding duplicates, similar images, and source pages | Visual matches and page links | Doesn't establish original authorship | Inspect linked pages |
| Google Lens | Finding matching images across websites | Similar images and web results | Results aren't chronological proof | Compare sources and credits |
| Google About this image | Investigating image history and context | First-seen clues and earlier uses | Not available for every image or region | Check original pages |
| TinEye | Finding older crawls and edited copies | Crawl dates, sizes, and changed versions | Crawl date isn't publication date | Confirm dates independently |
| Image metadata | Finding technical and creator clues | EXIF, IPTC or content credentials | Metadata can be missing or modified | Cross-check official records |
| Stock sites and portfolios | Identifying creators and licensing | Creator names, image IDs and usage terms | Images may be syndicated | Match the exact photograph |
| Google text search | Following captions and watermarks | Names, articles and contextual information | Text can be copied or misattributed | Verify attribution |
| Web archives | Investigating older or deleted pages | Historical snapshots | Capture date isn't the initial publication date | Compare several captures |
| Direct creator contact | Confirming attribution or permission | Firsthand statements and records | Responses may take time | Request supporting details |
As you can see, no single method gives you the complete picture.
You'll often need to combine a few of them to narrow down your search and verify what you find.
But before we start using these methods, there's something important to understand:
what do we actually mean by an image's "original source"?
It might sound obvious, but the person who took the photo, the website that published it first, and the agency that licenses it aren't always the same.
Let's clear up that difference first, so you know exactly what you're looking for.
What Counts as the Original Source of an Image?
Before tracing an image, there's a surprisingly important question: what exactly are you trying to find?
"Original source" can mean several things.
- Original creator: The photographer, artist, designer, or organization that made the image.
- First publisher: The website, newspaper, or platform that initially made it public.
- Official licensing source: The agency or library authorized to distribute it.
- Earliest surviving upload: The oldest accessible online copy you can verify.
- Highest-resolution source: A location offering a master or relatively unaltered version.
- Original context: The event, location, or story the picture actually documents.
And here's the interesting part: these can all point to different sources.
Let's say a freelance photographer captures a dramatic wildfire scene.
A newspaper publishes the photograph first, a photo agency later distributes it, and dozens of websites repost it.
Now, who owns the original?
The photographer created the image, the newspaper may have published it first, and the agency might handle its licensing.
Each plays a different role.
So, the source you need depends on what you're planning to do with the image.
If you're writing an article, you may need to credit the photographer and publisher.
If you want to use the picture commercially, you'll need to identify who controls the relevant rights.
And if you're checking whether a viral photograph is being shared with a misleading caption, finding its original context matters most.
Understanding these differences helps you avoid a common mistake: assuming that the first website you find must be the original source.
Now that you know which type of source you're looking for, let's start tracing the image and see what evidence we can uncover.
How to Find the Original Source of an Image Step by Step
Finding an image's source is easier when you follow a clear process instead of opening random search results.
We'll begin with the picture you have, locate possible sources, and check the evidence before drawing a conclusion.
Let's start with the image itself.
Step 1: Save the Best Available Version of the Image
Your investigation begins with the image itself.
A tiny screenshot with half the background missing gives search engines less visual information to work with.
A complete, higher-quality copy often contains details that help uncover earlier versions.
Here's how to prepare:
- Save the available image. Download it when permitted, or capture a screenshot for research.
- Keep the full picture. Avoid cropping until you've saved the original version.
- Copy the page URL. Record exactly where you found the image.
- Examine visible clues. Look for signatures, watermarks, usernames, captions, logos, and location details.
- Check the dimensions. Compare the displayed size with the actual image file dimensions when possible.
- Preserve metadata. Don't resave or edit your only copy before examining embedded information.
Quick tip: If you found the image on a website, try opening the picture in a new tab before saving it. The version displayed inside an article may be smaller than the actual image file.
Remember to keep the original file untouched and use a separate copy for cropping or editing during your searches.
Consider a photo of a mountain with a small photographer's signature in the bottom corner.
Cropping that corner away might make the image prettier, but it also removes your best clue.
Keep separate copies for searching and editing.
On a computer, you can usually check dimensions through the file's properties or information panel.
Browser developer tools can also reveal an image's intrinsic dimensions.
A larger image is helpful because it may preserve details lost through resizing or compression.
However, resolution alone doesn't establish originality.
Someone can upscale a downloaded photograph without owning or creating it.
Step 2: Run an AI Reverse Image Search
Once you've saved the picture, it's time to find out where else it appears online.
Instead of typing keywords to describe the image, reverse image search lets you upload the picture itself and look for visual matches.
To show you how this works, let's use a real photograph with a documented history.
The Image We'll Use for Our Test
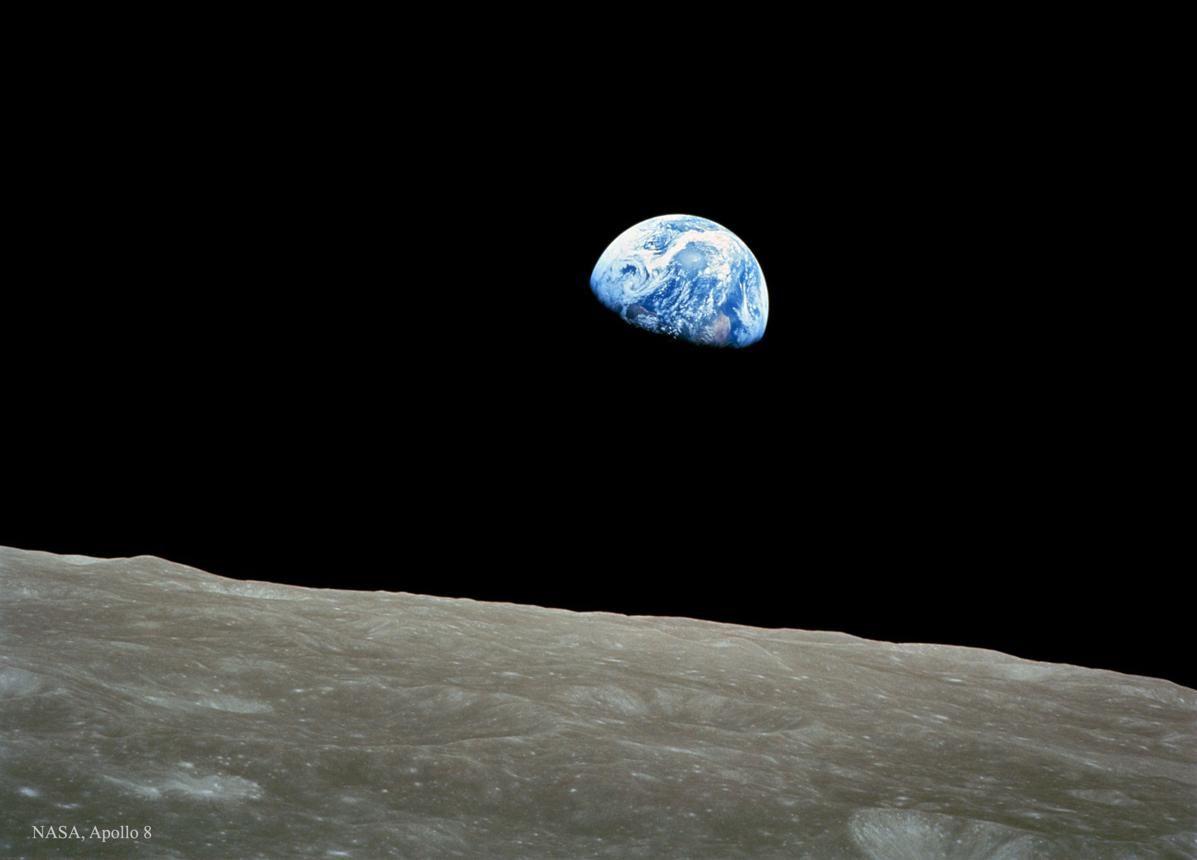
We've chosen Earthrise, a famous photograph taken by NASA astronaut William Anders during the Apollo 8 mission on December 24, 1968.
The picture shows Earth appearing above the Moon's horizon.
Since NASA has official records identifying its photographer and origin, it's a useful example for learning how to verify image sources.
How to Search This Image Using CopyChecker
Now, let's use this picture to look for matching images and possible source pages.
- Open CopyChecker's AI Reverse Image Search.
- Download the Earthrise photograph from NASA and upload it to CopyChecker. You can also drag and drop an image or enter its URL if the interface supports that option.
- Review the consent notice and click Search with AI.
- Examine the available duplicate images, similar images, and source-page results.
- Open the most promising websites to check whether they contain the exact photograph.
- Record any photographer credits, publication dates, image dimensions, or references to earlier sources.
CopyChecker supports common image formats, including JPG, PNG, WEBP, and GIF, and helps locate visually matching images and possible source pages.
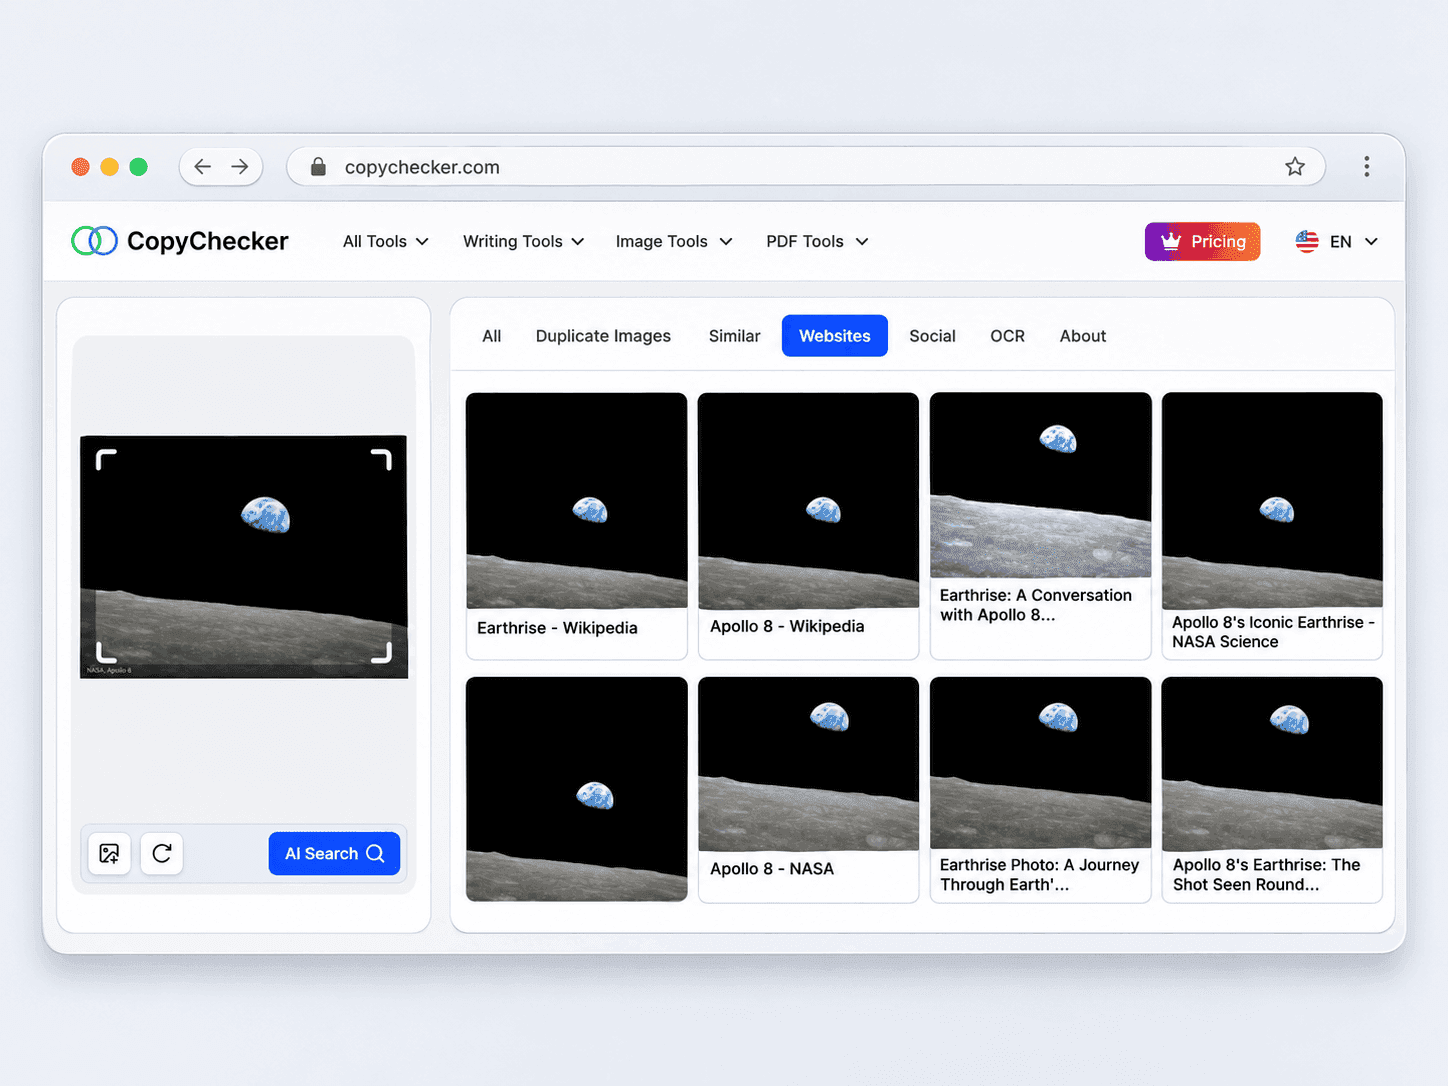
CopyChecker image search results for NASA's Earthrise photograph, showing the matching images and available source pages.
What Did We Learn From the Image Search?
To see how reverse image search works, we uploaded NASA's famous Earthrise photograph to CopyChecker's AI Reverse Image Search.
After running the search, we opened the Websites tab to see where the photograph appeared online.
The results included several relevant pages, such as:
- Earthrise – Wikipedia: A page dedicated to the famous photograph.
- Apollo 8 – Wikipedia: Information about the NASA mission during which the image was captured.
- Apollo 8's Iconic Earthrise – NASA Science: NASA's official page documenting the photograph.
We also found other websites displaying the same or similar versions of the picture.
Why Does This Matter?
CopyChecker successfully helped us discover multiple websites containing the Earthrise photograph, including NASA's official website.
But finding those pages doesn't automatically tell us which one published the image first.
That's why NASA's official record is particularly useful.
It identifies astronaut William Anders as the photographer and confirms that the image was captured during Apollo 8 on December 24, 1968.
The search gave us several promising sources, while NASA's documentation helped us verify the photograph's creator and original context.
Next, let's see whether Google Lens can reveal any additional clues about the same photograph's online history.
Step 3: Use Google Lens and About This Image
Now that CopyChecker has helped us find websites containing the Earthrise photograph, let's see what Google Lens can tell us about the same image.
Google Lens helps you find matching photographs, explore related websites, and discover additional clues about an image's origin.
Here's how to use it:
- Open Google Lens through Google Images, the Google app, or a supported browser.
- Upload the same Earthrise photograph we searched with CopyChecker.
- Explore the Exact matches and Visual matches tabs to find websites displaying the photograph.
- Adjust the crop if you want to focus on a particular part of the picture.
- Open promising results and examine their image credits, captions, and publication dates.
- Look for About this image, when available, to investigate the photograph's history and earlier appearances.
We followed these steps using NASA's Earthrise photograph. Here's what Google Lens displayed.
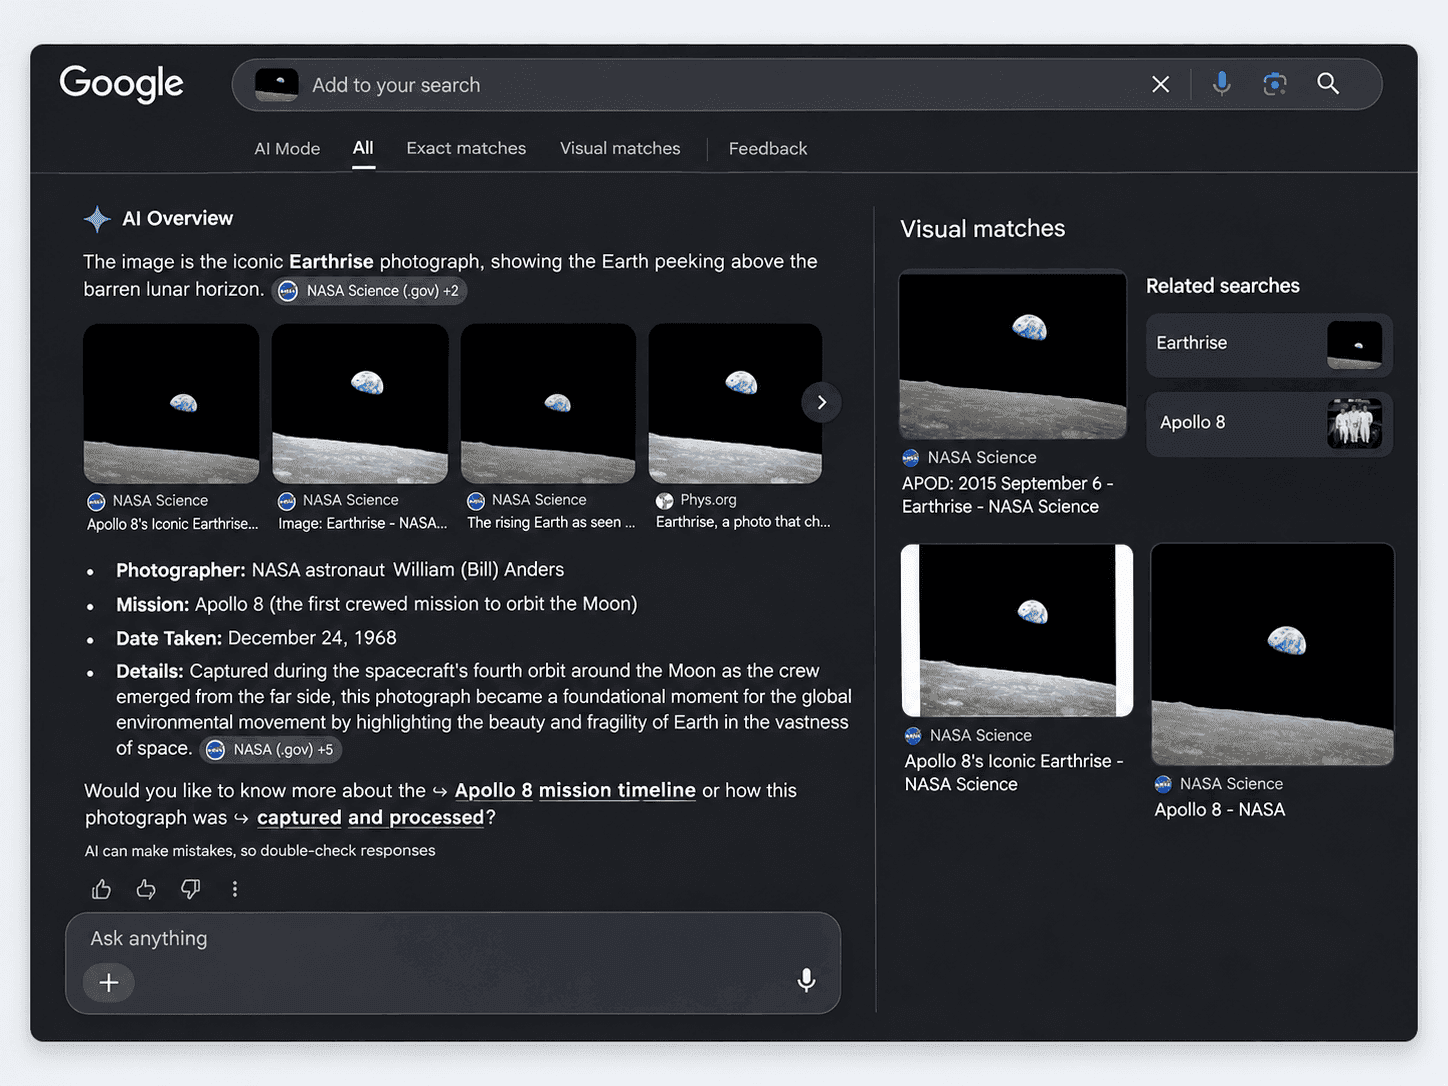
Google Lens identifies the Earthrise photograph and displays an AI Overview with its photographer, Apollo 8 mission details, capture date, and matching images from NASA Science and other websites.
What Did Google Lens Reveal About the Same Image?
Unlike the CopyChecker results, which helped us locate websites displaying the photograph, Google Lens also provided an AI Overview identifying the image and explaining its history.
Here's what we found in our test:
- Image identification: Google recognized the photograph as Earthrise, showing Earth above the Moon's horizon.
- Photographer: It identified NASA astronaut William (Bill) Anders.
- Mission: The AI Overview connected the image to Apollo 8.
- Capture date: It reported December 24, 1968.
- Matching sources: The results included NASA Science pages and a Phys.org article featuring the photograph.
The Visual matches section also displayed NASA's Apollo 8's Iconic Earthrise, Apollo 8, and an Astronomy Picture of the Day entry dated September 6, 2015.
These findings gave us several useful clues, particularly the links to NASA's official records.
So, did Google Lens help us find the original source?
Yes, it helped us identify the photograph and locate authoritative sources documenting its origin.
However, Google's AI Overview isn't proof on its own. We can verify the photographer and capture date by checking NASA's official Earthrise record.
Our screenshot also doesn't show an About this image first-seen date, so we can't determine when Google initially discovered the photograph.
That's an important distinction.
Google Lens helped us trace the image to credible records, but it didn't establish which website published it first.
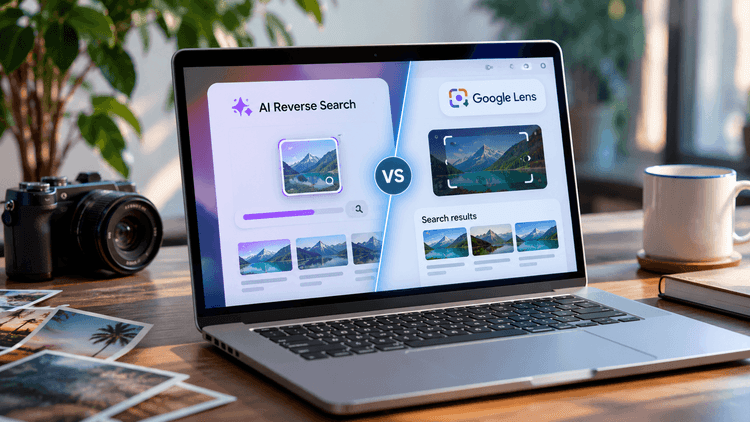
For a detailed comparison of these approaches, read our guide on AI reverse image search vs Google Lens.
Now that we've identified the photograph and found credible sources, let's investigate whether we can locate older crawled copies or edited versions.
That's where TinEye comes in.
Step 4: Sort TinEye Results Carefully
Now that Google Lens has helped us identify the Earthrise photograph and find reliable NASA sources, let's see what TinEye can reveal about its online history.
TinEye is useful for finding older copies of images, locating higher-resolution versions, and identifying photos that have been cropped or edited.
We'll continue using the same Earthrise photograph to compare its results with CopyChecker and Google Lens.
Here's how to use it:
- Open TinEye and upload your photograph or paste its image URL.
- Start with Best Match to find visually similar or identical copies.
- Select Oldest to arrange results by when TinEye first discovered them.
- Switch to Biggest Image to look for higher-resolution copies.
- Try Most Changed to explore modified or edited versions.
- Use Compare to examine differences between matching images.
We uploaded NASA's Earthrise photograph to TinEye and examined the results. Here's what appeared.
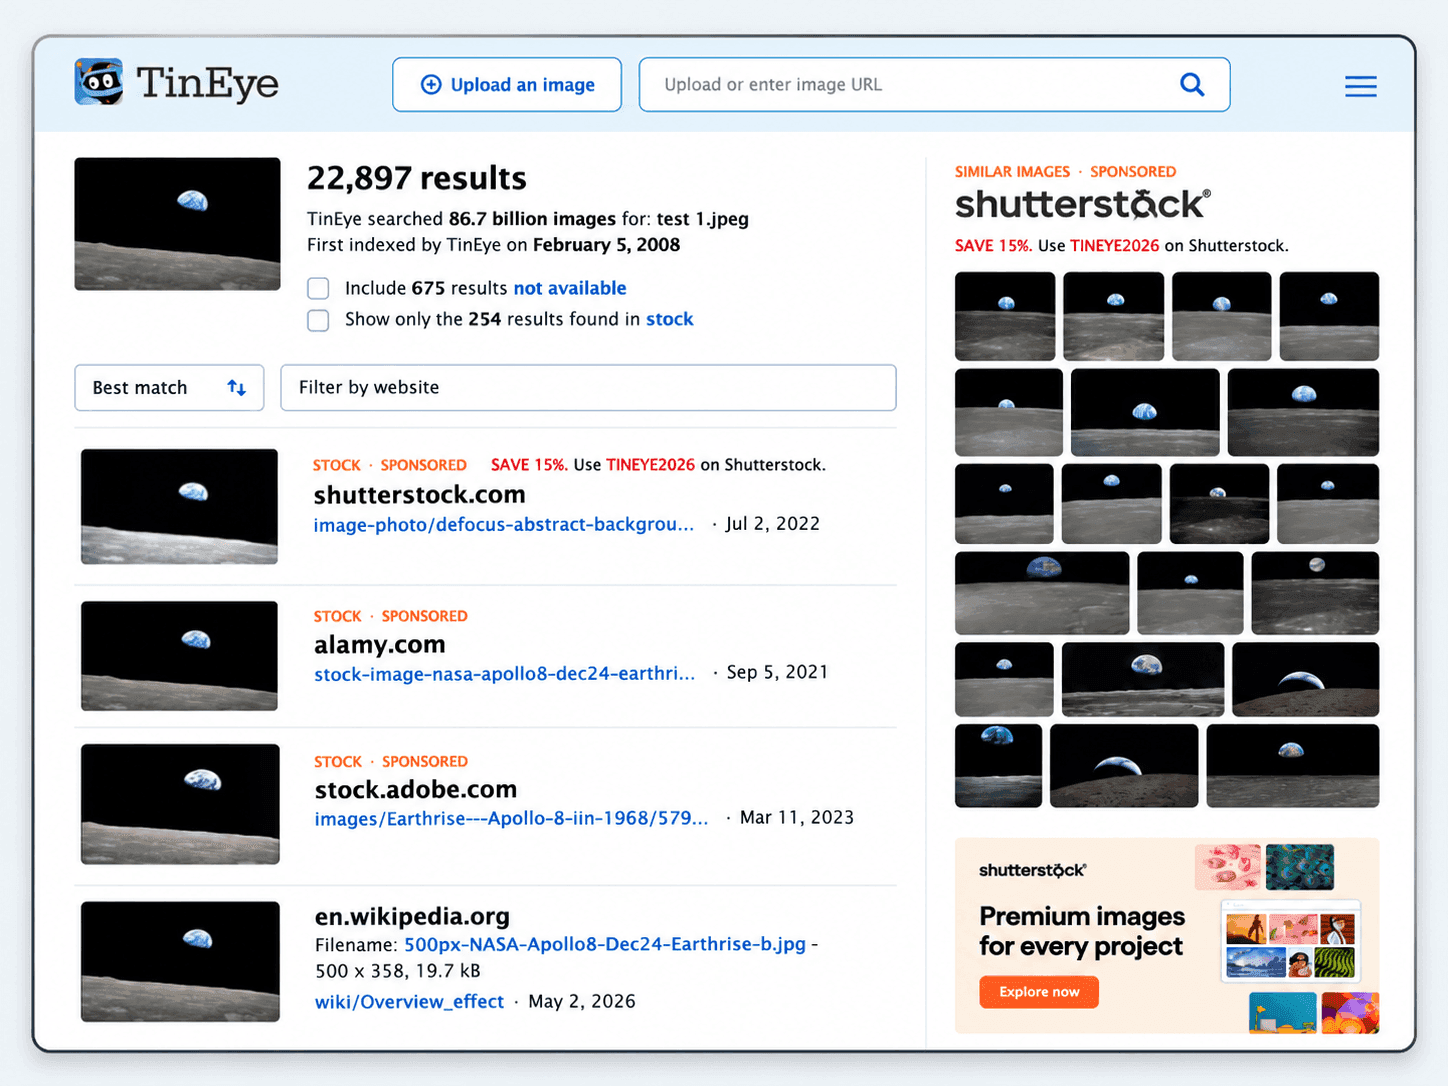
TinEye search results for NASA's Earthrise photograph showing 22,897 matches, a first-indexed date of February 5, 2008, and matching images from Wikipedia and stock-photo websites.
What Did TinEye Find in Our Earthrise Test?
TinEye returned 22,897 results for Earthrise, suggesting the photograph has been widely reproduced across the websites in its search index.
The search summary also reported that TinEye first indexed the image on February 5, 2008.
Among the visible results were:
- Wikipedia: A matching Earthrise image listed at 500 × 358 pixels.
- Alamy: A stock-photo listing featuring the Apollo 8 photograph.
- Adobe Stock: Another listing containing the image.
- Shutterstock: A sponsored stock-photo result showing a matching image.
These results gave us additional places to investigate, but they also raised an important question.
Does the February 5, 2008 date mean Earthrise first appeared online that day?
Not necessarily.
That date tells us when TinEye first indexed the image, not when it was originally published.
NASA's official records confirm that William Anders captured Earthrise on December 24, 1968, decades before TinEye discovered a matching image.
The Wikipedia result also displayed a 500 × 358-pixel version, but that doesn't establish whether it was the largest or earliest available copy.
Similarly, the stock-photo listings show where the photograph appears, not who originally created it.
So, what did we learn?
TinEye helped us discover numerous copies of Earthrise and provided a useful clue about its online history.
However, its results alone couldn't establish which website first published the picture.
For the photographer's identity and capture date, NASA's official documentation remains a more reliable source.
Now that we've used CopyChecker, Google Lens, and TinEye to locate matching images, how do we decide which source is actually trustworthy?
That's what we'll explore next.
Step 5: Inspect the Candidate Source Pages
By now, we've searched the Earthrise photograph using CopyChecker, Google Lens, and TinEye. All three tools helped us discover websites displaying the same image.
But here's the real question: Which of these websites can we actually trust as a source?
To find out, we need to look beyond the matching pictures and examine the pages themselves.
When you open a promising result, check the following details:
- Photographer or creator: Does the page identify who took or created the image?
- Image credit: Is there a caption mentioning a photographer, agency, or organization?
- Publication date: When was the page published, and can that date be verified?
- Original context: Does the page explain where, when, and why the photograph was taken?
- Source links: Does it reference an official website, archive, or earlier publication?
- Image quality: Is the picture complete, or has it been cropped or modified?
- Licensing details: Does the page explain where to find information about image rights?
You don't need every detail to be present, but a page with reliable credits and supporting records is usually more useful than one simply displaying the photograph.
Let's Compare Two Earthrise Sources
Remember how CopyChecker found Earthrise on Wikipedia and NASA's official website?
Let's compare what those sources tell us.
| What We Checked | Wikipedia | NASA Science |
|---|---|---|
| Same Earthrise photograph | Yes, matching image appeared in our search | Yes, official photograph displayed |
| Photographer identified | Attribution can be checked in the article and image records | William (Bill) Anders |
| Photograph's date | Historical information available through the article | December 24, 1968 |
| Page publication date | Not established by our search screenshot | February 22, 2019 |
| Source information | Leads readers toward supporting references | Original caption, NASA credit, and downloadable photographs |
| What it helps verify | Image identification and background information | Photographer, mission, capture date, and original context |
The difference becomes clearer when we examine NASA's official Earthrise page.
It identifies William Anders as the photographer, confirms the photograph was captured on December 24, 1968, and provides the original NASA caption.
Wikipedia can be a useful starting point for researching the image, but NASA's records provide more direct evidence about the photograph's origin.
Here's another detail worth noticing.
NASA's Earthrise webpage is dated February 22, 2019, even though the photograph was taken in 1968.
Does that make NASA's page unreliable?
Not at all. It simply means the webpage was published much later than the photograph was captured.
This is why you should always distinguish an image's creation date from the publication date of a webpage containing it.
You can also examine a page's last-updated date or structured information when available. Just remember that an update date doesn't necessarily reveal when the image first appeared.
So, what did we learn from comparing these sources?
Both websites can help us investigate Earthrise, but NASA provides stronger primary evidence about who took the photograph and when.
That doesn't prove NASA's current webpage was the first place the image appeared online. It does, however, give us a reliable source for identifying its creator and original context.
And that's the goal of this step: find the page with the strongest supporting evidence, not simply the oldest-looking result.
Now that we've checked the information published alongside the photograph, let's investigate something less obvious.
What if the image file itself contains clues about its creator or history?
That's where image metadata comes in.
Step 6: Check Image Metadata for Hidden Clues
An image can contain information beyond its visible pixels.
This information is called metadata, and it can offer useful clues about how a photograph was captured, edited, credited, or distributed.
Three types are especially relevant.
EXIF Metadata
EXIF data may include camera model, exposure settings, and capture date.
Some photographs also contain GPS information, although you should never publish private location details without an appropriate reason and permission.
A capture date can support a timeline, but device clocks may be inaccurate.
IPTC Metadata
IPTC fields can contain a creator name, credit line, copyright notice, licensing information, or rights-related website.
These fields are especially useful when investigating professional photography.
C2PA Content Credentials
C2PA is a standard for recording verifiable information about digital content provenance, including certain creation and editing processes.
When present and valid, content credentials can help establish which software or device signed the associated information.
However, a valid technical signature doesn't independently prove every real-world authorship or copyright claim.
Google documents support for extracting relevant IPTC and C2PA information in eligible circumstances.
Google for Developers
To inspect metadata, use a trusted desktop application or metadata viewer, preferably one that lets you examine the file locally.
Check any embedded creator names, timestamps, source URLs, and rights information.
Then compare those details with what the candidate websites say.
Remember: Metadata can be removed, copied, or changed. Treat it as supporting evidence, not a final verdict.
What should you look for?
After opening the file in a trusted metadata viewer, check for fields such as Creator, Copyright Notice, Date Taken, and Credit.
For example, if the Creator field contains a photographer's name, search that name alongside the image's subject.
Then check whether an official portfolio or agency record supports the same attribution.
If these fields are missing, don't worry. Many websites remove metadata when they upload or compress images.
Step 7: Search the Creator, Credit, or Watermark
Sometimes, the most useful clue isn't the photograph itself. It's a small name, signature, or watermark that tells you who might have created it.
If you spot any of these details, try searching them on Google. You might find the photographer's official website, portfolio, or an image archive containing the original picture.
Let's continue with our Earthrise photograph.
In the previous steps, we discovered that NASA credits astronaut William Anders as the photographer.
Now, instead of searching the image again, we can use that information to look for its original source.
Try these Google searches:
- "William Anders" "Earthrise"
- "Earthrise" "Apollo 8"
- "William Anders" NASA photograph
- "AS08-14-2383" NASA
The quotation marks help Google find exact names, titles, or image identifiers.
These searches can lead us to NASA's official records, where we can verify the photographer, mission, and capture date.
For example, NASA's Earthrise archive identifies William Anders as the photographer and confirms that he captured the image during Apollo 8 on December 24, 1968.
That's much stronger evidence than finding his name mentioned on an unrelated blog.
What if the image doesn't have a visible photographer's name?
Look for other clues, such as a watermark, social media username, artwork signature, or stock-photo ID.
Search those details separately and check whether they lead to an official creator portfolio or licensing page featuring the exact image.
If you're tracing an illustration or digital artwork, our guide on how to find the original artist of an image explains additional ways to identify its creator.
Just remember, a watermark or credit isn't automatically proof of ownership. Someone could have added it while reposting another person's work.
Always check whether reliable sources support the attribution.
Now that we've found evidence identifying the photographer, there's another important detail to investigate: when did the image actually appear online?
Let's look at how to verify publication dates without confusing them with an image's creation or search-engine discovery date.
Step 8: Verify When the Image Was First Published
Dates can either clarify your investigation or send it in completely the wrong direction.
The trick is knowing what each date actually means.
| Date Type | What it Tells You |
|---|---|
| Creation date | When the image was reportedly captured or created |
| Publication date | When a particular page or publication was released |
| Crawl date | When a search engine discovered the image |
| Archive date | When a website snapshot was recorded |
| Modified date | When a file or webpage was updated |
These dates can differ by months or years.
Start by checking the publication dates of your most credible candidate pages.
For example, NASA's Earthrise photograph was captured on December 24, 1968, but NASA also has a webpage about it dated February 22, 2019.
The newer webpage date doesn't change when the photograph was taken.
Similarly, if TinEye discovers an image in 2015, that doesn't mean it was published in 2015. The photo may have appeared online years earlier.
That's why you should compare dates from different sources rather than relying on a single timestamp.
Step 9: Decide Which Image Source Is Most Credible
By now, you've found matching images, explored their source pages, and checked dates and creator credits.
But before deciding you've found the original, ask yourself five questions:
- Is it the exact photograph? Make sure it's not simply a similar image.
- Is the creator identified? Look for a photographer's name or official credit.
- Can you verify the date? Check whether reliable records support it.
- Is there an official source? Look for a portfolio, image archive, or licensing page.
- Does the context match? Make sure the caption and surrounding information agree with the picture.
For example, if a photographer's official portfolio contains the same photo and a reliable news publication credits that photographer, you have stronger evidence than a blog post with no attribution.
What if the evidence isn't complete?
Use the following descriptions to explain what you've actually established.
| Your Finding | What it Means |
|---|---|
| Confirmed | Reliable evidence establishes the specific claim, such as who created the image |
| Most likely | Several trustworthy clues agree, but something remains uncertain |
| Earliest found | You've identified the oldest reliable online copy you could verify |
| Unverified | There isn't enough reliable evidence to reach a conclusion |
You don't need to prove every detail to make a useful discovery. Just be clear about what you've confirmed and what remains uncertain.
Final Results: Did We Find the Original Source of Earthrise?
After searching the same photograph with CopyChecker, Google Lens, and TinEye, we found several useful clues about its origin.
Here's what our investigation revealed:
| What We Investigated | What We Found |
|---|---|
| CopyChecker | Found matching pages from NASA, Wikipedia, and other websites |
| Google Lens | Identified the Earthrise photograph, William Anders, and the Apollo 8 mission |
| TinEye | Returned 22,897 results and reported February 5, 2008, as its first-indexed date |
| Official records | NASA identifies William Anders as the photographer and December 24, 1968, as the capture date |
So, did we find the original source?
Yes, we traced the photograph to authoritative NASA records confirming its creator and original context.
However, we couldn't establish which website first published Earthrise online.
And that's an important lesson: finding the original creator and identifying the first website to publish an image are two different things.
By combining visual search results with reliable records, we reached a conclusion supported by evidence instead of simply trusting the oldest search result.
How to Verify That You've Found the Original Image Source
You've searched the image, compared different websites, and checked the dates and photographer credits.
Now comes the important question: Have you actually found the original source, or just another website that copied the image?
To figure that out, take one last look at the most promising page you've found.
Ask yourself:
- Does it show the exact image? Look for the complete photograph rather than a cropped or edited copy.
- Does it mention the creator? Check for a photographer's name, artist credit, or official organization.
- Can you trust the date? See whether the publication date matches other reliable records.
- Is there any supporting evidence? Look for an official portfolio, image archive, or licensing page.
- Does the context make sense? Check whether the caption and surrounding information match what the image shows.
You don't necessarily need every answer, but the more evidence you can verify, the better.
For example, imagine finding the same photograph on three websites.
The first is a blog with no photo credit.
The second is a news article mentioning a photographer.
The third is that photographer's official portfolio, featuring the exact picture.
In this case, the portfolio provides stronger evidence of who created the image, especially if the news article confirms the same credit.
Here's a simple rule to remember: Don't trust a source just because it appears first in search results. Look for at least two independent pieces of evidence that support your conclusion.
And if you still can't identify the original, that's okay.
You can report the earliest reliable source you found without claiming it was the very first.
Now, let's see how this works with a real photograph.
But there's one more challenge you might run into.
What if the image you're searching for doesn't look like the original anymore?
Maybe someone cropped it, added text, or changed the colors.
Here's how to handle that.
How to Find the Source of a Cropped or Edited Image
Finding the original source becomes a little trickier when someone has modified the picture.
Imagine seeing a viral photograph with a motivational quote covering half the image.
You want to know who took the original photo, but searching the edited version doesn't give you useful results.
Here's what to try:
- Search the image as it is. Upload the edited picture to a reverse image search tool and check for matches.
- Remove unnecessary elements. Make a separate copy without added text, borders, or graphics, then search again.
- Focus on recognizable details. Crop around a distinctive object, building, landscape, or other visible feature.
- Look for an unedited version. Compare the results to find a complete photograph without the added changes.
- Check the source page. Once you find a promising match, investigate its photographer credits and publication details.
You can also use TinEye to compare different versions of the same image.
Remember, finding a visually similar picture isn't enough. You want to make sure it really is the same photograph.
Once you've found a likely original version, the next question is who actually created it.
How to Find the Original Photographer or Artist
Sometimes you'll find the original-looking image but still won't know who took the photograph or created the artwork.
That's because the website displaying it might not belong to its creator.
A news website, for example, could be using a freelance photographer's work.
Similarly, an Instagram account might repost an illustration made by someone else.
So, how do you find the person behind the image?
Start by looking for a photographer's credit, artist signature, watermark, or copyright notice.
If you find a name, search for it on Google alongside the image's subject.
Next, check whether the person has an official website or portfolio featuring the same picture.
For stock photographs, the image's licensing page may help you identify the photographer or agency.
If you're still unsure, you can contact the publisher or creator directly to ask about the image.
One thing to keep in mind: The person who uploaded an image isn't necessarily the person who created it or owns its copyright.
But what happens if you've found a promising source and the webpage no longer exists?
There's still a way to investigate.
What If the Original Image Page Is Gone?
You finally find a link that looks promising, click it, and get a 404 error.
Frustrating, right?
Fortunately, a missing webpage doesn't always mean the image's history is lost.
Start by checking the URL in the Wayback Machine. It stores snapshots of many websites, so you might find an older version of the page.
If an archived copy exists, look for the image, its caption, and any photographer credits.
You can also search the old page title or URL on Google. Sometimes other websites have linked to or mentioned the missing source.
Another option is to visit the photographer's current portfolio or search an official image archive.
If you still can't find the original page, use the earliest credible source you can verify.
Just remember that an archived copy proves the image was available on that page by a certain date, not necessarily that it first appeared there.
Now, suppose you've successfully identified the image's creator and original source.
Can you use the picture on your own website?
That's a separate question, and it's worth checking before you publish anything.
Finding an Image Source Doesn't Grant Reuse Permission
Finding the original photographer or website is useful, but it doesn't automatically give you permission to reuse the picture.
Even if you credit the creator, the image may still be protected by copyright.
Before using it in your blog, social media post, or advertisement, check whether you have the necessary rights.
You can start with CopyChecker's Image Copyright Checker to investigate possible copyright information.
Then confirm the actual usage terms through the creator or official licensing source.
Some photographs are available under Creative Commons licenses, which allow certain uses if you follow the license conditions.
For these images, you may need to provide:
- Title: The image's name, if available.
- Author: The photographer or artist.
- Source: Where you found the original image.
- License: The applicable Creative Commons license.
You may also need to mention whether you've modified the picture.
Other images may be in the public domain, but you should verify that status rather than assume it.
For example, NASA images are generally not protected by US copyright, although certain restrictions can still apply, including rules about endorsement, NASA identifiers, and third-party content.
The safest approach is to check the image's licensing terms or obtain permission from the appropriate rights holder before using it.
After all, finding where an image came from and having permission to use it are two different things.
When in doubt, obtain permission from the relevant rights holder before publishing.
FAQs
Does TinEye's oldest result show the original image?
Not always. TinEye's oldest result shows when it first discovered the image, not when it was published. Check the page's publication date and creator information to verify its origin.
Can metadata identify the original photographer?
Yes, sometimes. IPTC metadata may contain the photographer's name, copyright details, and credits. However, metadata can be changed or removed, so verify it using reliable sources.
How do I find the source of a cropped image?
Upload the cropped photo to a reverse image search tool and try searching different parts of it. Look for uncropped versions and verify their source pages, dates, and credits.
How can I identify an image's copyright owner?
Check the image's copyright notice, metadata, licensing page, or photographer's portfolio. Confirm ownership through official sources, as the photographer and copyright owner may be different.
What if several websites claim to own the same image?
Compare creator credits, publication dates, licensing records, and archived pages. Prioritize independently verified evidence rather than assuming the oldest or highest-resolution copy proves ownership.
Can I use an image after finding its original source?
Not automatically. You need permission, a suitable license, public-domain status, or another valid legal basis. Simply finding the original source or crediting the creator doesn't guarantee reuse rights.
How do I cite an image when its true original is unknown?
Cite the most credible source available, including the image title, known creator, and source URL. If the photographer is unknown, clearly state that the original creator couldn't be verified.
Final Thoughts on How to Find the Original Source of an Image
Finding an image's original source isn't always as simple as finding its oldest online copy.
Start with reverse image search to discover matching websites.
Then examine publication dates, photographer credits, metadata, and official records to identify the most credible source.
If the photograph has been cropped or edited, try searching different versions to uncover additional clues.
And remember, finding the creator or original publisher doesn't automatically give you permission to reuse the image.
The goal is to follow the evidence and understand what it actually proves.
Ready to investigate your own photo?
Upload an image to CopyChecker's AI Reverse Image Search to discover matching pages and start tracing its source.